
Introduction:
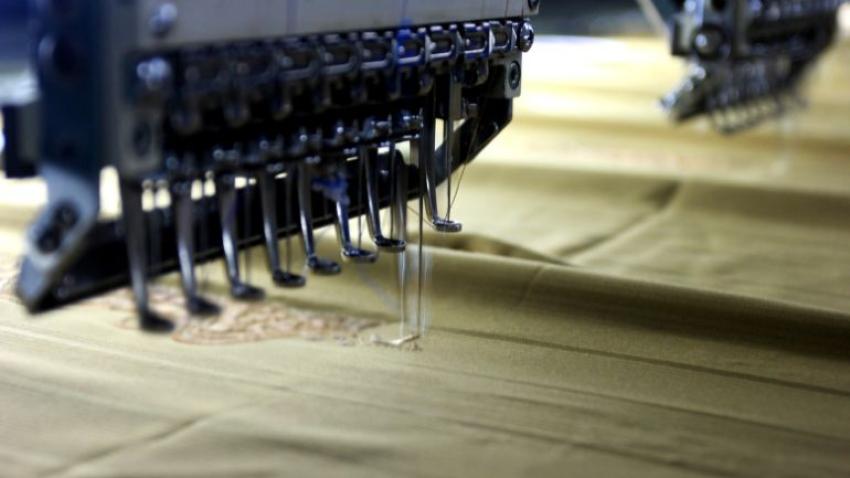
The digitizing of embroidery is a complex process that transforms artwork into stitch files suitable for embroidery machines. But, even the most experienced digitizers make mistakes in stitching that could affect the design. No matter if you are a beginner or an experienced professional, staying clear of these mistakes is vital for achieving perfect embroidery.
In this article, we’ll look at expert advice to avoid common mistakes in digitizing embroidery, so that your designs are perfect each time.
Why Avoid Stitching Errors in Embroidery Digitizing?
The result of a stitching errors could be:
Poor design quality
Fabric puckering or distortion
Thread breakage and machine malfunctions
Wasted materials and production time
If you follow the correct techniques, you can avoid mistakes and create professional-quality embroidery.
Common Stitching Errors in Embroidery Digitizing and How to Avoid Them
1. Incorrect Stitch Density
Error: A large number of stitches in a limited area may cause puckering of the fabric, and a lack of stitches can create a patchy appearance.
Solution:
Adjust the density of stitching according to the fabric type.
Use a lower stitch density for thick fabrics and higher for thinner materials.
Try the design on a sample of fabric before you finalize.
2. Poor Underlay Stitching
Error: Skipping underlay stitching can cause distortion and uneven embroidery.
Solution:
Use the right type of underlay (edge walk, center walk, zig-zag, or tatami).
Make sure that the underlay stitches are stabilized on the fabric prior to when the main stitching begins.
3. Incorrect Pull Compensation
Error: Fabric stretching can cause distortion, which makes designs appear smaller or misshapen.
Solution:
Adjust the pull compensation settings to limit the movement of fabric.
Utilize a stabilizer to help ensure that the fabric stays in position.
4. Thread Breakage Issues
Error: A high tension on the thread or a poor digitizing can cause threads to snap.
Solution:
Make use of high-quality embroidery thread.
Reduce excessive stitch density.
Adjust thread tension according to the type of fabric.
5. Overlooking Fabric Type
Error: When using identical stitching settings across all fabrics could cause problems like gaps or puckering.
Solution:
Set the settings for digitizing to be adapted to the fabric type.
Utilize soft fill stitches to protect delicate fabrics and tight stitches for sturdy materials.
6. Unbalanced Satin Stitches
Error: The extra-long satin stitches can create loops and cause thread fraying.
Solution:
Maintain satin stitches under 12mm in length.
Use split stitches for long areas to maintain durability.
7. Not Using the Right Stabilizers
Error: A shift in the fabric while stitching can result in distorted designs.
Solution:
Utilize cutaway stabilizers for stretchable fabrics.
Utilize tear-away stabilizers for non-stretch fabrics.
Use water-soluble stabilizers for sheer or delicate materials.
8. Ignoring Design Scaling Issues
Error: Expanding or reducing designs without altering the stitch settings may cause inconsistent results.
Solution:
Modify density and stitch count when resizing designs.
Test stitch outs following any adjustments to the size.
Expert Tips to Ensure Flawless Embroidery Digitizing
1. Test Your Design Before Final Production
Always do a test stitch-out on a similar fabric to determine any problems.
2. Use High-Quality Embroidery Software
Make sure you invest in an custom embroidery digitizing software that’s professional such as Wilcom, Hatch, or Pulse to get the best results.
3. Follow a Structured Digitizing Workflow
Make sure you plan your stitch sequences in advance to avoid overlaps and ensure the smoothness of your embroidery.
4. Avoid Too Many Color Changes
Reduce the number of color changes you can make in your design to cut down on production time and thread breaks.
5. Keep Stitch Lengths Optimized
To ensure smoother stitching, keep an average stitch length of 3–4mm for fill stitches and less than 12mm for satin stitches.
6. Choose the Right Needle Size and Type
Different kinds of fabrics require different sizes of needle and kinds. Make sure you match your needle with the fabric.
7. Ensure Proper Hooping
The incorrect hooping process can result in designs that aren’t aligned. Be sure that the fabric is taut but not overstretched.
Final Thoughts
Making sure you avoid stitching mistakes in digitizing is vital to ensure top-quality embroidery. When you set the proper stitch settings, using correct stabilizers, and optimizing the process of digitizing, you can ensure flawless embroidery results every time.
Are you seeking professional digitizing services for your embroidery? Get in touch with experts who’ll convert your designs into stunning stitch files with zero errors!


