Introduction:
In the ever-evolving landscape of web design, the importance of high-quality graphics cannot be overstated. One key technique that has gained significant traction is vector conversion. This process not only enhances the scalability of images but also contributes to improved loading times and overall visual appeal. In this comprehensive guide, we'll explore the best practices for vector conversion, empowering you to take your web graphics to the next level.
What is Vector Conversion?
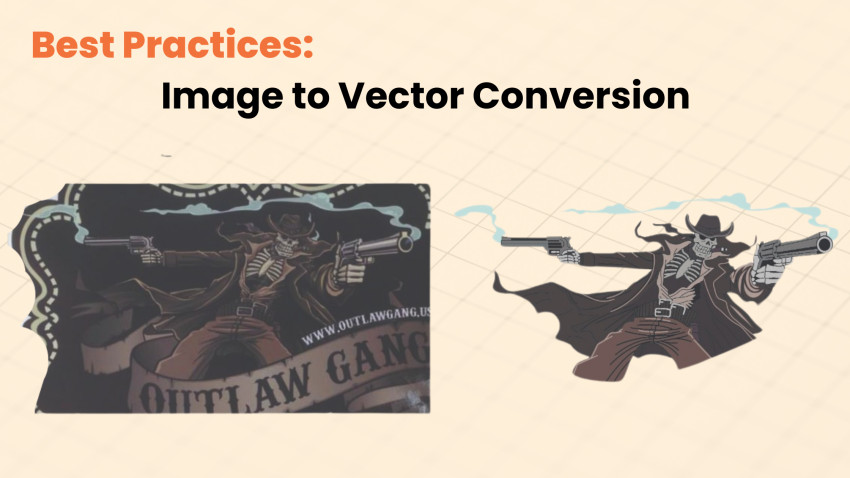
Before delving into best practices, let's clarify what vector conversion entails. Unlike raster images composed of pixels, vector graphics use mathematical equations to define shapes. This distinction makes vector images infinitely scalable without sacrificing quality. Vector conversion, therefore, involves transforming raster images into scalable vector formats, such as SVG (Scalable Vector Graphics).
Benefits of Vector Conversion for Web Graphics:
1. Scalability
Vector graphics can be resized without loss of quality, ensuring your web graphics look sharp on devices of all sizes. This is especially important given the multi-device environment of today
2. Improved Loading Times
Vector images are lightweight compared to their raster counterparts. Faster loading times contribute to a positive user experience and can positively impact your website's search engine rankings.
3. Enhanced Editing Capabilities
Vectors are editable to their core. This means you can easily modify shapes, colors, and other elements without compromising quality. This flexibility is a boon for designers iterating on their creations.
Best Practices for Vector Conversion:
1. Choose the Right Tool
Selecting the appropriate vector conversion tool is paramount. Popular options include CorelDRAW, Inkscape, and Adobe Illustrator’s. Consider your specific needs and skill level when making this decision.
2. Maintain Original Intent
When converting from raster to vector, strive to preserve the original design intent. Pay attention to details such as colour, shading, and fine lines. This ensures that the essence of the image remains intact.
3. Optimize Paths and Anchor Points
Clean and efficient paths contribute to a smaller file size. Remove unnecessary anchor points and simplify paths while maintaining the overall integrity of the image.
4. Pay Attention to Colour
Vector graphics support a wide range of colours. When converting, ensure that the colour palette is preserved. Consider using Pantone or CMYK for print, and RGB for web.
5. Use Consistent Strokes and Fills
Maintain consistency in strokes and fills to create a polished and professional look. This ensures that your vectorized graphics seamlessly integrate into your web design
In the ever-evolving landscape of web design, the importance of high-quality graphics cannot be overstated. One key technique that has gained significant traction is vector conversion. This process not only enhances the scalability of images but also contributes to improved loading times and overall visual appeal. In this comprehensive guide, we'll explore the best practices for vector conversion, empowering you to take your web graphics to the next level.
Before delving into best practices, let's clarify what vector conversion entails. Unlike raster images composed of pixels, vector graphics use mathematical equations to define shapes. This distinction makes vector images infinitely scalable without sacrificing quality. Vector conversion, therefore, involves transforming raster images into scalable vector formats, such as SVG (Scalable Vector Graphics).