Vehicle wraps have become a popular way to give cars a fresh, eye-catching look. However, when it's time for a change or the vinyl wrap has started to deteriorate, removing it can be quite a challenge. Using the right tools and techniques, you can tackle this task efficiently and without damaging your vehicle's surface. In this article, we will provide you with a comprehensive step-by-step guide on how to remove a vehicle wrap safely and effectively.
Gather the Right Tools
Before diving into the vinyl wrap removal process, it's essential to have the right tools on
hand. Here's a list of items you'll need:
- Heat Gun or Blowtorch
These tools will help make the Florida car wrap is more pliable and soften the adhesive, making it easier to peel off.
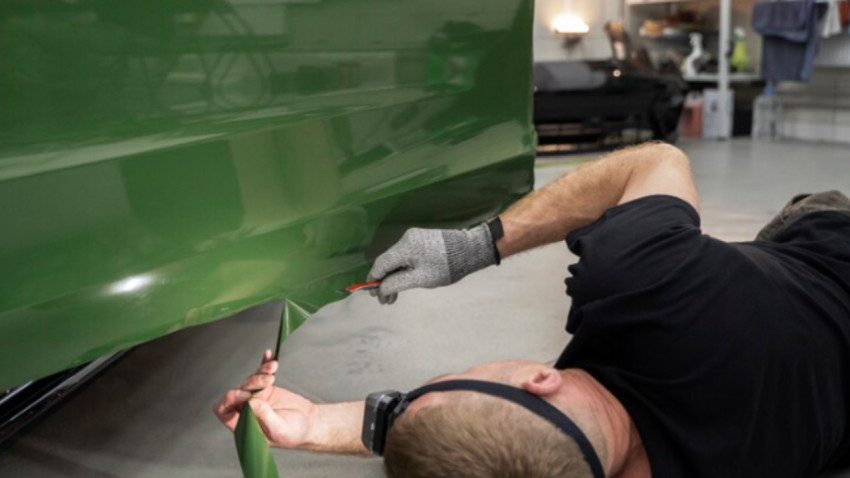
- Plastic Scraper or Squeegee
Use a plastic scraper or a squeegee to carefully lift the edges of the vinyl and avoid scratching the vehicle's surface.
- Residue or Adhesive Remover
To clean off any stubborn adhesive left behind after removing the vinyl.
- Isopropyl Alcohol
This can be used as an alternative to adhesive remover for cleaning.
Step-by-Step Vinyl Wrap Removal Guide
Step 1: Prepare the Work Area
Start by parking your vehicle in a shaded area, away from direct sunlight. Extreme heat can make the vinyl overly pliable, leading to a messier removal process. Also, make sure your vehicle's surface is clean and free from any dirt or debris.
Step 2: Warm the Vinyl
Use the heat gun or blowtorch to warm up a corner of the car painting Fort Lauderdale. Be cautious not to apply too much heat at once, as it may damage the car's paint or cause the vinyl to stretch. Gently lift the warmed corner with the plastic scraper or squeegee.
Step 3: Peel Off the Vinyl
As you continue to heat the vinyl, slowly peel it off using the plastic scraper. Work in small sections and maintain a moderate amount of heat. If you encounter any resistance, apply more heat to soften the adhesive.
Step 4: Remove Adhesive Residue
Once the vinyl is removed, you may find some adhesive residue left on the vehicle's surface. Apply an adhesive remover, adhesive solvent, or citrus-based cleaner to a clean cloth and gently rub the affected areas. Be patient, as this process may take some time.
Step 5: Clean the Surface
After removing all the adhesive residue and the auto detailing Fort Lauderdale FL, wipe down the surface with isopropyl alcohol to ensure it's entirely clean and ready for any potential reapplication of vinyl or other treatments.
Conclusion
Removing a vehicle wrap can be a daunting task, but armed with the right tools and techniques, it becomes more manageable. By following our step-by-step guide, you can safely and effectively remove vinyl wraps without causing damage to your car's paint or surface. Remember always to work in a well-ventilated area and exercise caution while using heat guns or blowtorches. With a little patience and elbow grease, your car will be ready for its next transformation or a fresh new look.