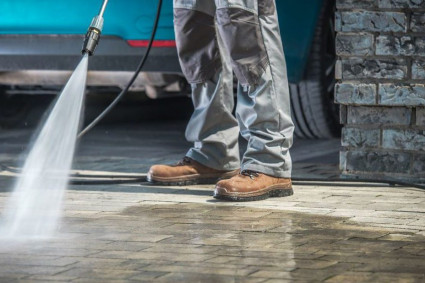
You watched the tutorial three times. You bought the expensive spacers. You checked your lines every ten minutes. And somehow, your tile still looks like it was installed during an earthquake. The grout lines zigzag, some tiles sit higher than others, and every time someone walks into the room you cringe a little. Here's the thing — it's not about the spacers.
Most DIY tile jobs fail in the first hour, not during installation. And the mistakes that cause crooked lines happen before you ever open the mortar bag. If you're dealing with a floor that looks obviously amateur, the good news is that sometimes it's fixable without ripping everything out. But first, you need to understand what actually went wrong. Working with a Tile Installation Contractor Rohnert Park, CA means catching these problems before they become permanent, but if you're past that point, here's what you're really looking at.
The Subfloor Lie That Ruins Everything
Most tile tutorials skip the boring part — checking if your subfloor is actually flat. And "flat" doesn't mean it looks flat. It means it doesn't vary more than 1/8 inch over ten feet. Your eye can't see that. A four-foot level can. And if your subfloor is off by 1/4 inch across a small bathroom, your tile will lippage no matter how perfect your spacing is.
Lippage is when one tile edge sits higher than the one next to it. It's the hallmark of amateur work. And spacers can't fix it because spacers only control the gap between tiles — they don't level the height. If your subfloor has a hump or dip, the tile follows it. Period. Pros spend an hour grinding down high spots or filling low spots with self-leveling compound before they ever think about tile. DIYers skip this because it's not in the YouTube video.
Here's the test: Lay a straight four-foot level on your finished tile in multiple directions. If you see gaps under the level bigger than a credit card, your subfloor wasn't prepped right. That's not fixable with grout tricks. That's a subfloor problem masquerading as a tile problem.
Trowel Technique That Nobody Teaches Correctly
You probably used a notched trowel. But did you hold it at a 45-degree angle and pull it in straight lines? Or did you swirl it around like you're frosting a cake? Because if you did the second thing, your mortar bed is uneven and your tile is sitting on random high spots instead of a consistent layer.
The notches in the trowel create ridges of mortar. When you press the tile down, those ridges collapse evenly — if they were applied correctly. If you swirled the trowel or held it flat, you get thick spots and thin spots. Thick spots create lippage. Thin spots create hollow tiles that crack later when someone steps on them. And spacers don't care about any of this because they're just plastic crosses sitting between tiles.
Professional installers pull the trowel in one direction, then lay the tile and twist it slightly while pressing. That twisting motion collapses the mortar ridges evenly. DIYers press straight down. That's the difference between 95% mortar coverage and 60% mortar coverage. And 60% coverage means some of your tiles are basically floating on air pockets.
What a Tile Installation Contractor Fixes First When Lines Look Off
When a Tile Installation Contractor walks into a room with crooked tile, they're not looking at the grout lines first. They're checking three things: subfloor prep, mortar coverage, and whether the tile itself is warped. Because here's the third problem nobody mentions — cheap tile isn't flat.
Porcelain tile under $3 per square foot often has a slight bow. It's not noticeable in the box. It's very noticeable when you try to lay fifty of them in a row. The edges don't sit flush. You get lippage even on a perfectly flat subfloor with perfect mortar technique. And the only fix is grinding down the high edges after the mortar sets — which is why pros either use better tile or charge extra for remedial grinding work.
Can your crooked tile be saved? Sometimes. If the lippage is under 1/16 inch and spread across the whole floor, a skilled installer can grind the edges flush and re-grout. If the lippage is over 1/8 inch or concentrated in specific areas, you're looking at removal and re-installation. The honest answer depends on how bad "crooked" really is. A level and a straightedge will tell you. Your pride won't.
Why Tile Removal Services Near Me Exists As A Search Term
Because a lot of DIY tile jobs end up needing professional Tile Removal Services near me. Not because people are lazy, but because fixing bad tile is often harder than installing good tile from scratch. The mortar bonds to the subfloor. If the subfloor wasn't prepped right, removing the tile also damages the subfloor. And now you're not just re-tiling — you're repairing plywood and wondering if you should've just hired help in the first place.
The decision point is simple: If your tile is functional but ugly, live with it or grind it. If your tile has cracks, hollow sounds when you tap it, or lippage you can feel with your foot, it's a safety issue and needs to come out. Tripping hazards and broken tile edges are lawsuit territory if you ever sell the house. And home inspectors will flag it in their reports.
The One Fix That Actually Works Without Ripping Everything Out
Dark grout. Seriously. If your tile lines are slightly crooked but the tiles themselves are level, switching from white grout to dark gray or charcoal grout makes the irregularities almost invisible. The human eye focuses on contrast. White grout against colored tile highlights every misalignment. Dark grout against the same tile blends the lines together and your brain stops seeing the crookedness.
This doesn't fix lippage. This doesn't fix hollow tiles. This fixes the visual problem of slightly wavy grout lines caused by beginner-level spacer placement. And if that's your only issue, a grout color change might save you $5,000 and a week of dust. Just make sure you're being honest about what "slightly crooked" actually means. Because if your tile looks like a topographic map, dark grout just makes it a dark topographic map.
What Basement Tile Installation Teaches About Subfloor Prep
If you're planning future tile work, especially Basement Tile Installation near me, the lesson is simple: spend twice as long on prep as you think you need. Concrete slabs need moisture testing, self-leveling compound, and crack isolation membrane. Wood subfloors need reinforcement, leveling, and a proper underlayment. Skipping any of these steps doesn't save time — it just moves the failure point from "during installation" to "six months later when the tile cracks."
Professionals don't install tile faster because they're more skilled with a trowel. They install it faster because they spent eight hours prepping the subfloor so the tiling part only takes four hours. DIYers spend two hours prepping and twelve hours fixing problems that wouldn't exist if they'd prepped correctly. The math is brutal but honest.
When Professional Help Is Cheaper Than DIY Pride
Here's the uncomfortable truth: if your tile job failed and you're researching fixes online, you're already spending more time on this project than a pro would've taken to do it right the first time. Your materials aren't cheaper because you bought them yourself — pros get contractor pricing. Your labor isn't free because your evenings and weekends have value. And your subfloor damage from attempted removal now costs more to fix than the original installation would've cost.
This isn't about skill shaming. This is about realistic cost-benefit analysis. Tile installation has a steep learning curve and the mistakes are expensive. If this is your first or second tile job, hiring help isn't defeat — it's pattern recognition. You can't YouTube your way past subfloor physics or mortar chemistry. And the people who tell you it's easy are either lying or forgetting the three failed practice runs they did in their garage.
If you're looking at a floor that genuinely bothers you every time you see it, get three quotes for removal and re-installation. Compare that number to the cost of living with a floor you hate for the next decade. Sometimes the right answer is admitting the experiment failed and calling in a RSC Installation of tile & stone corporation team that does this for a living. Sometimes the right answer is dark grout and strategic furniture placement. Either way, at least now you know what actually went wrong.
Your crooked tile isn't a character flaw. It's a subfloor prep issue, a trowel technique issue, or a tile quality issue. And whether you fix it yourself or hire it out, at least you'll understand what you're paying for. Because the next time someone suggests a DIY tile project, you'll know exactly which questions to ask before you agree. And if you need expert guidance on whether your floor is salvageable or needs a reset, working with a Tile Installation Contractor Rohnert Park, CA means getting an honest diagnosis instead of another YouTube tutorial that skips the hard parts.
Frequently Asked Questions
Can I fix lippage without removing the tile?
Only if the lippage is under 1/16 inch. A grinder with a diamond blade can smooth the high edges flush with the lower tiles. Anything over 1/8 inch means the tile needs to come out and the subfloor needs leveling before re-installation.
How do I know if my tile is hollow underneath?
Tap each tile with the handle of a screwdriver. Solid tiles make a dull thud. Hollow tiles make a hollow ringing sound. If more than 10% of your tiles sound hollow, the mortar coverage was insufficient and they'll crack under normal use eventually.
Is white grout always a bad choice for crooked tile?
Not always, but it highlights every imperfection. If your lines are slightly wavy, dark grout minimizes the visual impact. If your lines are severely crooked, no grout color will hide it — the tile needs to be fixed or replaced.
Can I tile over my existing crooked tile?
Only if the existing tile is completely level with no lippage. If it's crooked, tiling over it just makes the new tile crooked too. The existing tile needs to be removed and the subfloor leveled before starting fresh.
How long should I wait before deciding if my tile job failed?
If you see lippage or hollow spots immediately after installation, those won't improve with time. If the tile looks fine initially but develops cracks or movement within six months, that's a subfloor prep or mortar coverage issue and it's only going to get worse.