
Introduction:
Embroidery, an ancient craft, has made a comeback in recent years. With this mix of creativity and relaxation, it’s no surprise that many people pick up the needles and thread. Whether you’re looking to customize your clothes, create special gifts or simply discover new interests, this guide will help you go from amateur to professional in easy steps. Let’s dive into the colorful world of DIY embroidery!
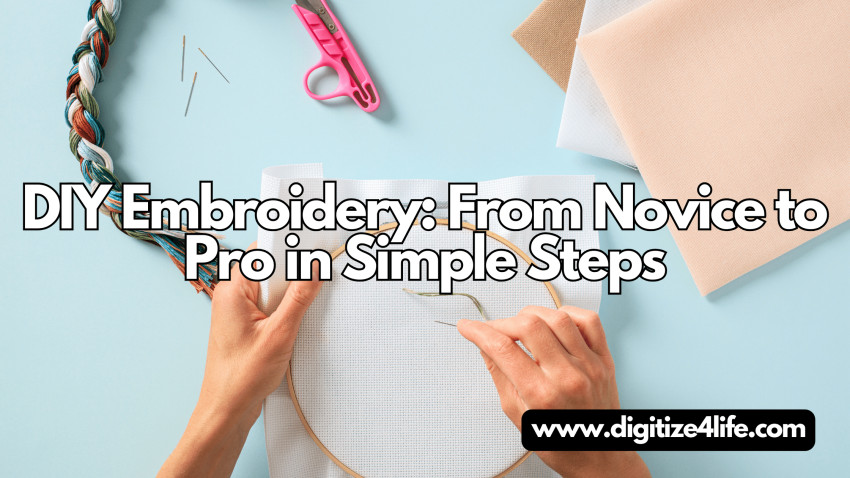
Getting Started: Essential Tools and Materials
Before starting your embroidery adventure, it’s important to gather the right tools and materials. Here’s a checklist to get you started:
Embroidery Hoops: These hoops keep your material taut, making sewing easier.
Embroidery Needles: If you want to work with multiple threads, choose large-eye needles.
Embroidery Thread: Available in a variety of colors, embroidery thread is the thread you use to sew.
Beginners should choose tightly woven fabrics such as cotton or linen.
Scissors: Small, sharp scissors are essential for precise wire cutting.
Pattern Transfer Tools: Use transfer pens, pencils, or water-soluble markers to suggest placement on the fabric.
Learning the Basics: Basic Stitches
Mastering a few basic stitches is essential for any embroidery project. Here are some essential stitches to get you started:
Running Stitch: This simple stitch creates a dash effect. It’s perfect for contouring and adding texture.
Back Stitch: Ideal for defining shapes, the back stitch creates a continuous line.
Satin Stitch: Use this stitch to fill shapes with clean, solid areas of color.
French Knot: With this little knot point.
Chain Stitch: This chain-like paper work is great for defining and incorporating texture.
Step by Step: Creating Your First Embroidery Project
Now that you’ve gone over your supplies and basic stitches, it’s time to start your first project. Follow these simple instructions:
Choose a Template: Start with a simple template. Floral patterns, geometric shapes or perhaps a monogram are great choices for beginners.
Transfer Template: Use your sample transfer tool to suggest a template for your material.
Prepare the Fabric: Place the fabric in the embroidery hoop and make sure it is taut but not tight.
Needle Thread: Cut a piece of embroidery thread (about 18 inches) and thread it through the needle. To prevent it from slipping through the fabric, tie the end in a knot.
Start Sewing: Start by creating an outline using the backstitch technique. Start by filling in the areas with a satin stitch, then add details with a French knot or chain lace.
Finishing: When the pleating is complete, carefully remove the fabric from the ring and cut the excess threads.
Intermediate Techniques: Improving Your Skills
As you gain confidence, you can begin to explore more complex strategies. Here are some ways to improve your embroidery skills:
Layer Stitches: Combine unique stitches to create texture and depth.
Color Blending: Use multiple shades of thread to create a gradient effect.
Pearls and Sequins: Add sparkle and dimension by adding pearls and sequins.
Embroidery on Different Fabrics: Try different fabrics like denim, silk or shoelaces.
Creative Projects: Inspiration For Every Occasion
Embroidery is remarkably versatile, so you can customize a variety of things. Here are some business ideas to inspire you:
Custom Clothing: Add unique designs to jackets, jeans or shirts.
Home Decor: Create embroidered cushions, wall hangings or table legs.
Gifts: Handmade embroidered items such as bookmarks, key chains or packages are thoughtful and personal.
Accessories: Embroider places to attach to bags, hats or shoes.
Problems: Common Challenges and Solutions
Every embroiderer faces difficult situations along the way. Here are some common problems and ways to fix them:
Tangled Cord: Minimize the length of cord and keep your work area clear to avoid tangles.
Uneven Stitching: Practice makes perfect. To keep the stitches regular, pay attention to tension and spacing.
Pattern Transfer: If the pattern does not transfer properly, try a unique joining technique or a tighter weave material.
Embroidery Care: Care and Storage Tips
Taking care of your embroidered pieces will ensure they stay beautiful for years to come. Follow these instructions:
Washing: Hand wash embroidered items with a mild detergent. Avoid twisting or twisting the fabric.
Drying: Dry the devices by placing them out of direct sunlight.
Ironing: When ironing with a low iron, protect the embroidery with pressure cloth.
Storage: Store embroideries flat or rolled, avoid folding to prevent wrinkles.
Resources and Inspiration: Join the Community
Embroidery is more fun when you share it with others. Here are some ways to connect with the embroidery network:
Online Forums and Groups: Join online communities like r/Embroidery on Reddit or Facebook businesses dedicated to embroidery.
Workshops and Classes: Find neighborhoods or virtual workshops to learn new strategies and meet other hobbyists.
Social Media: Follow embroidery artists on Instagram or Pinterest for tips and tutorials.
Books and Magazines: Consider investing in embroidery books and magazines to expand your knowledge and spark your creativity.
Conclusion: Your Embroidery Journey
Embarking on an embroidery adventure is an interesting and valuable experience. With the right tools, strategies and concepts, you can go from beginner to pro in no time. Remember, practice and persistence are the keys. So grab a needle and thread and start sewing your way to a beautiful personalized creation. Good luck with your embroidery!
By following these instructions and immersing yourself in the world of embroidery, you will quickly find your own intricate and beautiful pieces that show your true fashion and creativity. Whether you’re looking to dress up your wardrobe, decorate your home or give heartfelt gifts, the art of embroidery offers countless opportunities for expression and leisure.


