
Introduction:
Embroidery is an ancient craft that has historically been associated with fabric. However, many innovative possibilities have gone far beyond this traditional environment. Today, artisans and artists experiment with embroidery on different surfaces, pushing the boundaries of this flexible art form. From wood and leather to metal and paper, each surface offers special demanding situations and amazing results. In this blog we explore techniques, equipment and suggestions for embroidering on unusual surfaces, unleashing global creative potential in your projects.
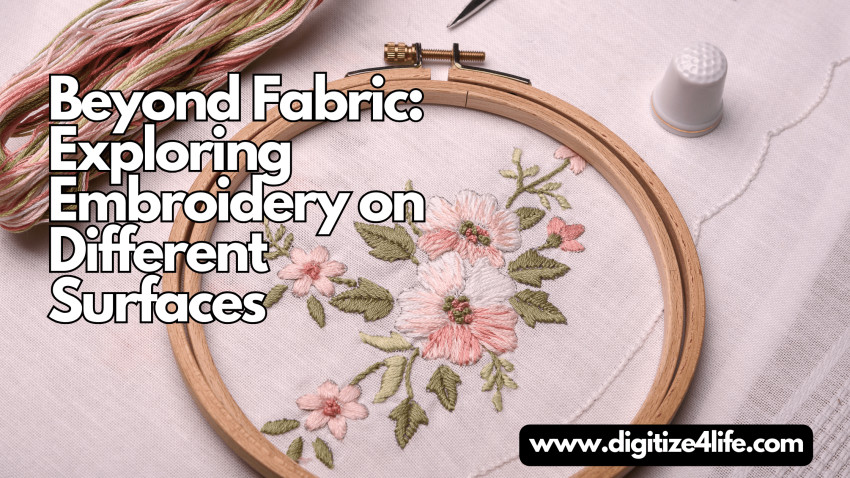
The Versatility of Embroidery
Embroidery has long been valued for its ability to transform everyday material into something spectacular. With needle and thread, you can bring intricate patterns, colorful hues and personal details to clothing, home décor and accessories. However, embroidery can be done on almost any floor if you use the right techniques and equipment.
Embroidery on Wood
Wood is a strong and visually pleasing embroidery surface. The natural grain and texture of the wood adds a unique dimension to the embroidered patterns, making them stand out perfectly. Here’s how to get started with wood embroidery:
Materials Needed:
Thin wooden boards or wooden objects (eg bases, ornaments)
Embroidery thread
Large eye needle
Drill to make holes
Sandpaper
Steps:
Prepare the Wood: Sand the surface of the wood to make sure it is clean. If you are working with a larger piece, cut it to the desired shape and length.
Create a Pattern: Draw the pattern on the wood or use a template. Mark where the seams will go and make sure the holes are slightly spaced.
Drill Holes: Carefully drill or push holes into the sample marks. Make sure the holes are big enough for the needle and thread to pass through.
Start Embroidering: Cut the needle with embroidery thread and start sewing through the holes according to the pattern. Use simple stitches like back stitches or running stitches for a satisfying effect.
Tips:
Use thin, flexible wood to make drilling easier.
Experiment with unusual woods to see how the grain affects your design.
Embroidery on leather
Leather is a kind of interesting embroidery floor, which gives a rich texture and strength that the material cannot be healthy. Whether you’re embellishing a leather jacket, bag or accent piece, leather embroidery can create a precise look and placement.
Materials Needed:
Leather goods or leather parts
Waxed thread or strong embroidery thread
Leather needle or sharp needle
Ring
Steps:
Choose Leather: Choose leather sometimes thick because it is easier to sew. A thin leather sole or suede is good for embroidery.
Draw Your Pattern: Transfer your design from fabric to leather with pen or chalk.
Sewing: Use a leather needle specially designed to pierce heavy materials. A thimble can help push the needle through thicker areas. Start with simple stitches like running, chain stitch, or satin stitch.
Finishing: Tie the thread on the back of the leather in a tight knot so it doesn’t come off.
Tips:
Use waxed thread for strength and durability.
Test your stitches on skin-based material before doing the main quest.
Embroidery on metal
Metal can also seem like a favorite for unusual embroidery; However, with the right technique, it can produce beautiful results. This method is regularly used to grow decorative items, jewelry and artwork.
Materials Needed:
Thin steel sheets or metal objects (eg cans, aluminum foil)
Strong wire or thread
Needle suitable for metal
Hammer and nail or steel punch
Protective gloves
Steps:
Metal Preparation: Choose a thin sheet of metal that is easy to work with. Wear protective gloves to avoid injury.
Mark Your Design: Draw your layout on a metal surface with a permanent marker. Plan where your stitches will go and mark the points.
Making Holes: Use a hammer, nail, or steel punch to make holes in the location marks. Make sure the holes are big enough for the needle and thread.
Sewing: Thread the needle with strong thread or string and start sewing through the holes. Use primary stitches, such as walking stitches or back stitches, to outline the layout.
Tips:
Work slowly and carefully to avoid bending or adversely affecting the steel.
Experiment with unique steel types and finishes for different results.
Embroidery on paper
Paper is a delicate and unexpected surface for embroidery. It is best suited for developing detailed greeting cards, wall art and scrapbooking elements. The most important thing is to use light stitches that do not tear the paper.
Materials Needed:
Thick paper or cardboard
Embroidery thread
Needle with a small eye
Paper cutter or needle
Embroidery hoop ( optional )
Steps:
Selection of Paper: Choose a thick paper or card that will withstand the needle and thread without tearing.
Draw Your Template: Carefully draw the outline on paper with a pencil. Mark the points of the seams.
Punch Holes: Use a paper punch or needle to punch holes in the pattern markers.
Start Embroidering: Thread the needle with embroidery thread and sew through the holes. Use simple stitches like back or leg stitches for great results.
Tips:
Keep the stitches soft and don’t pull the thread too tight to avoid tearing the paper.
Use an embroidery hoop to keep the paper flat and steady as you work.
Embroidery on plastic
Plastic surfaces can add a modern twist to simple embroidery. This method is often used for equipment such as plastic fabric, packaging or footwear.
Materials Needed:
Plastic objects or plastic fabric
Embroidery thread or strong thread
Needle suitable for plastic
Marker or chalk
Steps:
Prepare the Plastic: Clean the floor of the plastic object. If you are using plastic fabric, cut it to the desired shape and size.
Mark Your Design: Draw a pattern on the plastic with a marker or chalk. Plan where your stitches will go.
To Start Sewing: Turn the needle and start sewing straight through the plastic. On plastic surfaces, simple stitches, such as a gusset or back stitch, work well.
Tips:
Feel free to use a sharp needle through plastic.
Experiment with unique yarn colors and textures for unique looks.
Combining surfaces
One of the most interesting features of current embroidery is combining special surfaces in a single challenge. Imagine a mixed artwork with embroidery on material, wood and metal, a universal piece. This technique allows for an indescribable amount of creativity and can create truly unique effects.
Final Thoughts
Embroidery is no longer tied to material. By exploring unique surfaces, you can expand your innovation horizons and convey beautiful custom designs. It was seasoned.


