
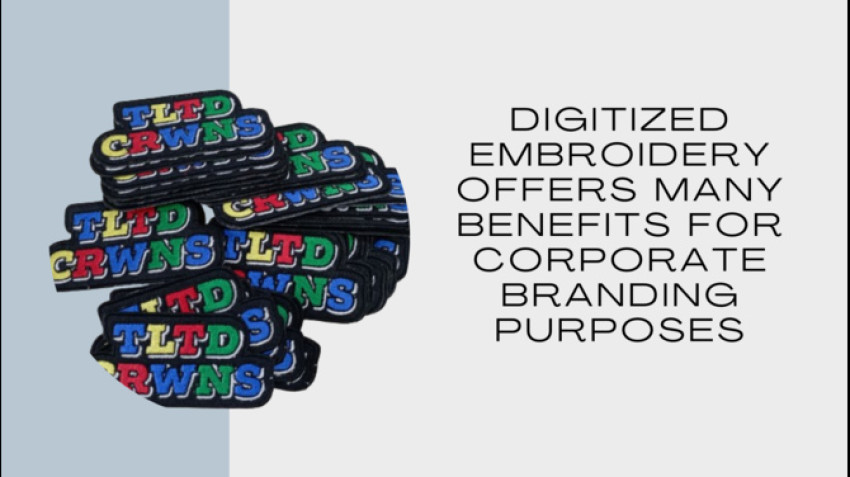
Embroidery digitizing is the process of turning artwork into an embroidery machine-readable digital file. It is essential to corporate branding because it enables businesses to precisely and consistently replicate their designs, slogans, and logos for their branded products or uniforms. Digitized embroidery has numerous advantages for corporate branding, including:
Expert, Uniform Appearance- Digitizing artwork guarantees that embroidered designs are sewn precisely the same each time, with the right stitches, thread colors, and positioning. This uniformity is essential for preserving brand identity across various products.
Durability - Machine embroidery produces strong, long-lasting stitches that withstand frequent washings and use, contributing to the lifespan of the brand.
Flexibility - Digital files are editable and resizable, allowing them to be used on a wide range of merchandise, from tote bags to polo shirts. This allows brands to be expanded over several products.
Efficiency - Digitized designs can be produced by automated embroidery machines more quickly and effectively than by hand stitching, which expedites the process of branding products for events, staff, or retail.
The following guidelines will result in polished, professional embroidery that accurately represents your brand: choosing digitizing software; hiring a professional digitizer versus doing it yourself; optimizing designs for different fabrics; choosing thread colors; using special stitches and effects; and more. We'll cover several best practices for digitizing embroidery designs to maximize quality and effectiveness for corporate branding purposes.
Selecting the Appropriate Embroidery Device
Your embroidery machine is one of the most crucial purchases you will make when launching a corporate branding embroidery business. When selecting an embroidery machine for commercial use as opposed to a hobby or home project, there are a few significant factors to take into account:
The number of heads on a commercial machine allows you to sew numerous items at once. Higher productivity is associated with more heads, so consider your company demand when determining the number of heads you require.
- Maximum embroidery area: Standard embroidery fields range from about 400x400mm to 800x600mm on commercial machines. Make sure the machine has hoop sizes to fit your demands. The hoop size determines the maximum size design you can embroider.
- Speed: At 400 to 1200 stitches per minute, commercial machines embroider more quickly than home machines; increased daily output results from faster speeds.
- Durability: Home machines cannot handle the same workload as commercial machines, which are designed for heavy, all-day operation in a demanding production environment.
Investing in a high-quality commercial machine will help maximize your productivity and brand potential. Some popular brands of commercial embroidery machines are Tajima, Barudan, Happy, SWF, and ZSK. Popular multi-head models include the Tajima Neo Plus 15-needle machine and the Barudan Elite 15-needle machine. The SWF E901 is a tried-and-true option for a single head. Work closely with dealers to test machines and determine the right configuration for your specific business requirements.
Software Digitization
You have a few options when it comes to digitizing software. Among the most widely used software programs for digitizing needlework are:
Wilcom EmbroideryStudio - Wilcom offers both monthly subscriptions and one-time purchase options for this professional program, which is one of the industry standards for digitizing and offers extensive auto-digitizing and editing tools, special effects, sequin tools, and more.
Pulse Ambassador - Pulse is a fully functional and reasonably priced digitizing program that can be directly integrated with commercial embroidery machines. Pulse is available as a monthly subscription plan.
Sierra Embroidery Office - Sierra offers both subscription and purchase models, and it connects with many commercial machines. It has both extensive capabilities and user-friendly digitizing tools for beginners.
Embird - Available for purchase outright, Embird offers an entry-level application that is economical for amateurs and home-based digitizers. It has a user-friendly interface but fewer design options than professional software.
Researching thoroughly will ensure you select digitizing software that best suits your business needs and budget. When evaluating embroidery software, take into account how you want to pay—a one-time fee or an ongoing subscription. Additionally, look at compatibility with the machines and design programs you have chosen. Many solutions allow integrating or exporting designs to other formats.
Comparing DIY vs. Hiring a Digitizer
There are advantages and disadvantages to both approaches when it comes to embroidery digitization for corporate branding. Companies can choose to either learn how to digitize in-house or engage in a professional digitizing service.
Contracting Out Digitization
Saves time and effort- Skilled digitizers can finish jobs far more quickly than inexperienced ones, and you won't have to spend hours learning the software and digitizing process.
Access to expertise - High-quality embroidery files are produced by skilled digitizers who have spent years honing their art and keeping up with the newest software, techniques, and industry trends.
Flexibility - You can swiftly scale up if you have an urgent project or need backup support because outsourcing provides you access to digitizers worldwide.
Cost- Compared to doing it internally, paying for digitizing services entails additional costs. Digitizing large or intricate logos can be highly costly.
Internal Digitization
Control – Some businesses would rather keep the digitization process internal, however with in-house digitizing, you have complete control over timeframes, quality, and privacy.
Custom expertise- Your brand image and style preferences will be familiarized with an internal digitizer, potentially resulting in a more personalized digitizing of your logo.
Cost savings - After the initial software/training investment, there are very few recurring costs associated with digitization, which results in long-term cost reductions.
Reliability- By eliminating the need for outside vendors, you lower the possibility of miscommunication or overworked digitizers.
When to Contract Out
The best times to outsource are when:
- You require digitization on an irregular or seasonal basis.
- Quick turnaround times are necessary
- The project calls for intricate 3D puff embroidery.
- Your branding could evolve in the future.
Time for In-House Work
When does in-house digitization function best?
- Continuous, large-scale digitization is necessary
Maintaining a consistent brand image is crucial.
You desire total command over the procedure.
- Privacy and security are important issues.
The budget is quite constrained.
Companies may design the optimal digitizing strategy to meet their unique corporate branding demands by analyzing the benefits and drawbacks of each approach. Cost, quality, and efficiency can be optimized by striking the proper balance between in-house and outsourced digitizing.
Digitization for Various Sources
The fabric or material you are digitizing embroidery designs onto has a significant impact on the process and outcome of the digitizing process; you will need to make adjustments during the digitizing process based on whether you are digitizing on knits, woven fabrics, hats, bags, or other items. Here are some important considerations:
Knits - There is some stretch and movement to knit fabrics, such as t-shirts. When working with knits, you should usually use underlay stitches to stabilize the design and avoid puckering after embroidery; you may also need to make adjustments for the shrinkage of knit fabrics during the embroidery process. Stitch types and directions that allow for stretch can help the design look good even on a flexible knit fabric.
woven Fabrics - Underlay is usually unnecessary for stable woven fabrics such as twill and poplin, but you still need to take the fabric's weave and texture into account when selecting the stitch density and directions; for example, on corduroy, it can be difficult to work across the weave's grooves rather than with them.
Hats - When digitizing structured hats, the cap's shape and brim's curve require special attention. Measure the cap's crown precisely, align or rotate designs appropriately, and use stitch types that can easily follow the cap's curves without bunching or gaps. Density and underlay are important to prevent shape loss if embroidering designs across the front of the brim.
Bags - Adjust density for lighter or heavyweight materials; if embroidering across seams, make sure the design alignment works; for straps and awkward spots, specialist settings like split designs may be required. Underlay for soft bags gives vital support for embroidery designs.
Pull Compensation – More pull compensation is often required for knits. Pull compensation is the practice of digitizing a pattern slightly larger or smaller than the final desired size to compensate for any shrinking or stretching of a fabric during the stitching process.
Underlay Stitches - The type and quantity of underlay are tailored to the fabric and are foundation stitches positioned beneath the main pattern to give stability, aid in the holding of shape, and keep the cloth from puckering or wrinkling.
The quality of an embroidery design is greatly influenced by the appropriate digitizing techniques used for the material; close collaboration with embroiderers allows digitizers to perfect designs for particular fabrics; experience and testing allow digitizers to gain knowledge of the specialized settings and stitches required to make designs look fantastic on any material.
Selecting Color for Thread
Here are some best practices for picking thread colors when digitizing embroidery for corporate branding. Choosing the correct thread color is vital for accurately expressing the brand image:
Align Brand Colors
- Determine which primary colors are used in the company's logo and brand style guide. - Authenticity is enhanced by using threads that perfectly match the brand colors.
Select threads that complement the colors that stand out the most in logos. - It can be challenging to imitate gradient effects in embroidery.
- To determine the closest DMC floss possibilities, see Pantone thread conversion charts if the brand employs Pantone colors.
Visibility through the Clothing
- Dark embroidery will not show up on black textiles; instead, choose thread colors that contrast sufficiently with the color of the garment.
- For better visibility while embroidery on dark-colored clothing, choose lighter or brighter thread colors.
- Take into account the intended usage of the clothing while choosing the right thread colors. Work uniforms call for more subdued embroidery, but trade show gifts could have bright, vivid colors.
Unique Threads
- Use metallic threads sparingly for minor embellishments to prevent excessive breaking. They can give luster and depth for luxury branding.
Use glow-in-the-dark threads for essential design elements alone (as they are more difficult to digitize) for brands catering to youth and nightlife customers.
- Subtle company names or minimalist logos might benefit from the subtle embroidered effects produced by using transparent and invisible nylon threads.
File Formats for Embroidery
Embroidery file types are one of the first things you'll need to learn when you start embroidery digitizing. The file format dictates how the embroidery design data is stored and sent to the embroidery machine. There are three primary options available:
Points to Remember
As you select a file format, take into account:
- Your embroidery machine's capabilities; some might only be able to read specific file types; DST offers the broadest compatibility.
- Editability: DST files can be resized and altered using a simple software program; other formats can need more complex editors.
Future requirements: DST offers flexibility in case you need to alter or resize designs in the future.
Choosing the appropriate format guarantees that designs are sewn correctly and provides flexibility for future tweaking and resizing.
Good Digitization Techniques
The digitization process must pay close attention to detail to produce high-quality embroidery. Among the finest techniques for digitizing high-quality embroidery patterns are:
Density
Finding the right balance for density depends on the design and fabric; generally speaking, 5,000–7,000 stitches per square inch provide good coverage on cotton. Too low density can lead to poor coverage and show the fabric through the design. Too high density uses excessive thread, slows down the embroidery machine, and can distort the fabric.
Length of Stitch
The recommended stitch lengths range from.3mm to.5mm for detail work up to 3mm for satin stitches. Keep stitches consistent and smooth by gradually increasing or decreasing the length of the design file. Abrupt stitch length changes can cause poor stitch formation. Use shorter stitches for tight curves and detail work and longer stitches for fills and wide satin stitches.
Stitch Guidance
Avoid excessive push and pull by cross-hatching fill stitches in alternating directions. This prevents distortion and maintains shape accuracy. Take into consideration stitch direction in fills to avoid distortions. Use stitch directions that follow the shape of the pattern and curves for smooth transitions.
Understructure
Underlay should extend slightly beyond the edges of the design shape; too little underlay can result in gaps, while too much underlay slows down production. When used properly, underlay provides a foundation, lessens fabric pull, and improves coverage. Common underlay techniques include edge walk underlay, center walk underlay, and netting.
Crisp Stitching
Check design files and pre-production sew-outs carefully to identify any unnecessary trims or tie-offs to clean up. Avoid unnecessary trims, tie-offs, and jumps in the design file. These can leave thread tails that require trimming and weak points in the design. Overlap adjacent sections and sequence the design to minimize these.
Unique Methods
The following are some of the most well-liked particular strategies to take into consideration that are made possible by embroidery digitizing and can significantly elevate your business branding:
Applicable
Applique is great for adding dimensional elements like animal features, flower petals, etc. Applique is sewing one piece of fabric on top of another to create interesting shapes and patterns. The bottom layer is embroidered first, then the fabric pieces are laid on top and tacked down by stitching around the edges. This allows you to have multiple fabric colors and textures combined in the design.
3D Embroidery and Puff
3D foam is available in various thicknesses to create subtle or noticeable raised 3D effects; puff embroidery is a related technique wherein a foam fill is inserted inside satin stitch designs as they are embroidered to create a pillowy, puffy effect that adds cool texture and dimension. 3D foam can be used as a backing to create raised embroidery for a textured, dimensional effect.
Chenille
Chenille embroidered elements match nicely with smooth satin stitched regions; chenille patches create a velvety finish by using a fuzzy yarn-like thread that stands up from the underlying cloth for a slightly raised, hairy texture. Chenille embroidered features work well on fuzzy features like animal fur.
Sequins
Sequin patterns work wonderfully for adding some subtle glitz and glamour to your logo or monogram. Sequins come in reels and are placed by the embroidery machine as the design stitches out. Each sequin is individually tacked down. Sequin embroidery can add some sparkle and shine to your branding.
Blending Textures
Combining unique techniques to create unique textures that stand out in branding is one of the coolest things about special techniques. Here are some examples: a mascot logo with a satin stitched body and chenille fur, appliqued facial features, and sequin accents. The possibilities are endless!
Final Thoughts
Any corporate branding initiative involving embroidered apparel or products must include embroidery digitizing as a critical step. Brands can guarantee their logos and designs are accurately translated into embroidery files by adhering to best practices when selecting the appropriate machinery, software, and digitizing team.


