Most business owners employ the QuickBooks application, which has multiple features that can supervise every core business function. Small and medium-sized business owners primarily operate this application to enhance their business performance. QuickBooks is your best option if you are new in this business industry. It has numerous advanced-level features that can help any business owner. Also, it quickly solves any issues without any hassles. However, some obscure factors can lead to errors affecting its operations. One such issue is the QBWC1039 error or QuickBooks Web Connector Error.
Different notifications arise on your screen when the error is triggered in your system. You have to check which notification you have got in your system and fix this issue according to the message. Here, we will discover a few solutions based on your notification. But first, we must understand what exactly QBWC1039 error is before knowing the answers.
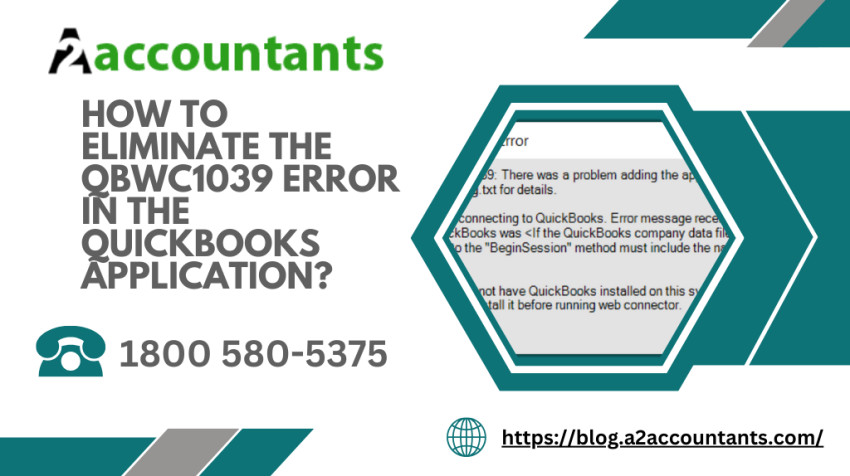
Description of QBWC1039 Error in QuickBooks Application
Sometimes, when users make multiple attempts to link an app to the QuickBooks software through the application, there is a possibility of striking the QBWC1039 error in your system. Generally, other QuickBooks errors come up with a single error notification. But, when the QuickBooks web connector error is triggered in your system, you can receive different notification pop-ups on your screen based on the factor, which can confuse users. The solution will be contrasted in all cases as the reasons may differ. Depending on the elements, the answer will be changing.
Why Are You Facing the QBWC1039 Error in the QuickBooks Application?
It is crucial to comprehend all the causes of QuickBooks Web Connector errors. Generally, there are multiple factors that might be responsible for this issue. Let's check out the pointer below to understand the root cause.
● Shifting the QuickBooks company file from the orginal location can be the primary reason for this issue.
● When the user makes multiple attempts to connect the application through the Web Connector, this can be the expected reason to trigger this issue.
● Changing the company file name is also responsible for striking this issue.
● The conflict between the company file and the application can also be responsible for such a problem.
How Can You Deal With QBWC1039 Error in QuickBooks Application?
Checking which notification you have in your system is necessary to eliminate this issue from the QuickBooks application. You can get the solution to stop this error based on the warning message. Check the below to get the solution depending on individual notification.
1. Unique OwnerID/FileID set value needed.
You can see this notification when you already have the QuickBooks application but are trying again to add it. First, you are required to delete the existing Owner ID to resolve this. After that, you can follow the method to eliminate this issue.
1. First, go to the QuickBooks application and open it, then download the CP3 tool and open it
2. Go to the Select file and find your QWC file. After that, go to the Enter QBWC file location
3. Click Open, then Remove Stamp
4. Afterwards, navigate to the QuickBooks Application Certificate, click Yes, and press Continue
5. Choose Done on the Access Confirmation
6. Next, click OK after following the guidelines.
7. When the Owner ID is deleted, you receive a confirmation
8. Lastly, add your third-party application again after reopening QuickBooks and Web Connector
2. Failed to add FileID to company file for this Application
When you try to include an app several times, you fail to add FileID to the company file. The application should only be added a single time in one location. Generally, a web connector provides one place to set up and manage your connected apps. Hence, installing the QuickBooks Web Connector is crucial. Here are the steps you must follow to install it.
1. Installing QuickBooks Web Connector
1. First, you have to close QuickBooks Desktop entirely
2. After that, enter the Intuit Developer site and download the recent Web Connector version
3. You must right-click the QBWebConnector2_R30 zip file, then choose Extract All
4. Again, right-click on the QBWebConnectionInstaller.exe file from the extracted folder and choose Run as Administrator
5. Follow the installation wizard to finish the process
6. Choose to Allow devices to make changes to your computer, then click the Next option
7. After that, press the “I accept the terms in the license agreement” option on the “License Agreement” page and choose Next
8. Select Install on the Ready to Install Program page and press Finish.
2. Web Connector Set Up
1. You can start with this procedure by Opening QuickBooks
2. After that, enter the File, choose App Management, and then go to Manage Web Apps
3. Choose Set up next to the app you wish to set up.
4. Next, click Connect to QuickBooks on the app website
5. Open the QuickBooks Desktop and choose Done on the Access Confirmation screen to finish your setup.
3. Not connecting to QuickBooks and receiving messages:
If this happens to your QuickBooks, you can move your QuickBooks company file and ensure the Web Connector is in the previous location as your company file. If you are not familiar with how you can find your company file, then follow the steps.
1. Choose Find a company file on No Company Open.
2. It automatically scans for the following file extensions:
● .QBW, your QuickBooks working file
● .QBB, your QuickBooks backup file
3. After this, you can scan for removable media like a USB flash drive or your network.
Besides this, you can manually look for files or backups with File Explorer
1. Go to the Start of the Windows menu and Open it
2. Type File Explorer into the search and open File Explorer
3. Next, click on My Computer or This PC from the navigation bar
4. Type *.qbw, *.qbb to discover all files in the Search bar.
4. When the application has not entered the QuickBooks company data file
If you are not signed in as the administrator while adding the QWC file to Web Connector, this issue will happen in your system. You can follow the method to eliminate this error.
1. First, you must Open the QuickBooks application and sign in as administrator in single-user mode
2. Go to the Web Connector and open it
3. Lastly, choose Add an Application and click the QWC file.
Bottom Line!
There are many tasks involved in the core business operation. However, as a single employer, it is hard to oversee everything. Hence, QuickBooks can assist you in managing everything at once. It has features that can make your work easy. QuickBooks can supervise every core business operation and generate each report accurately. However, for some unfamiliar reasons, QuickBooks strikes with various errors, and one such problem is the QBWC1039 error or QuickBooks Web Connector error. In this error, you get many notifications based on the cause. So, you must check which message you are getting in your system to fix this error.